Make Your Chorus Hit Harder

10 Essential Mixing Techniques to Make Your Chorus Hit Harder

In music production, the chorus is often the most important part of a song, and making it hit hard is key to keeping listeners engaged. A powerful chorus can elevate your track, making it memorable and emotionally impactful. In this post, we'll explore ten essential mixing techniques that can make your chorus hit harder, adding energy, punch, and dynamic contrast.

1. Dynamic Contrast: Creating Impact through Volume Automation

One of the simplest yet most effective ways to make your chorus pop is by creating dynamic contrast. By subtly lowering the volume of your verses, pre-chorus, or the section before the chorus, the listener is primed for a bigger moment when the chorus arrives. A slight volume increase (around 1-2 dB) in the chorus can create the perception of more power and energy.

Additionally, you can use frequency filtering to build anticipation. Gradually filter out low-end or high-end frequencies during the verses, and then release those frequencies when the chorus hits. This can create a sense of release and excitement.

2. Widening the Stereo Field for Depth and Space

A great way to add size to your chorus is by widening the stereo field. In the verses, keep your mix elements more centered and focused. When the chorus arrives, widen the stereo image by panning instruments, vocal doubles, or harmonies. This gives the impression of a larger soundscape.

Stereo effects like reverb or delay can also be used more prominently in the chorus. This can make the section feel more expansive and full compared to the narrower verses.

3. Layering Sounds for a Fuller Mix

Layering is a key technique for making your chorus feel more impactful. Stack additional instruments, synths, or vocal harmonies to fill out the frequency spectrum. Even subtle layers, like a doubled guitar or added synth pad, can contribute to the perceived fullness of the chorus.

For vocals, try doubling the lead vocal and panning the layers slightly apart. You can also add harmony layers or octave doubles to make the vocal sound bigger and richer.

4. Reinforcing the Low End with Bass and Kick

The low end plays a major role in giving your chorus power. Introducing a sub-bass or a new synth bass can reinforce the low frequencies and add depth. Make sure your bass is tightly locked with the kick for maximum punch.

Speaking of the kick drum, adding more impact in the chorus is essential. You can layer your kick with a sub-kick or simply emphasize its attack using EQ and compression to make it hit harder.

5. Shaping Transients for Punch and Definition

To make key elements like drums and vocals stand out in the chorus, focus on transient shaping. Using transient shapers or dynamic EQ can emphasize the attack of instruments like snares, kicks, and guitars. This adds punch and definition, helping those elements cut through the mix.

Additionally, sidechain compression can be used to tighten the low end. By sidechaining the bass to the kick drum, you can create more space and clarity, allowing the kick to punch through while maintaining a solid low-end foundation.

6. Adding Reverb and Delay for Depth

Reverb and delay can make a huge difference in creating a sense of space and depth in the chorus. During the verse, use shorter reverb tails to create an intimate, close-up feel. When the chorus hits, increase the reverb tail length or add a more lush reverb to make the space feel bigger.

Delay throws on key vocal phrases or instruments can also add excitement and dimension to the chorus, making it feel more epic.

7. Enhancing Harmonics with Saturation and Distortion

Subtle saturation or distortion can add harmonic excitement to your mix and make the chorus feel more energetic. Try applying harmonic saturation to vocals, guitars, or synths to give them more presence and edge. This can help the elements in the chorus stand out and feel more aggressive without overpowering the mix.

8. Volume Fader Swells for Pre-Chorus Tension

Automating fader swells leading into the chorus can create a sense of anticipation. By gradually increasing the volume of certain effects returns or instrument buses, you build tension right before the drop, making the chorus hit even harder when it arrives.

9. Arranging for Impact with Dropouts and Simplification

Sometimes less is more. By creating a momentary dropout or silence before the chorus, you create an element of surprise when the full mix returns. This break in the arrangement allows the listener to fully feel the impact of the chorus.

Another option is to simplify the arrangement in the pre-chorus. Strip back some elements so that when the chorus enters, the contrast makes it feel bigger.

10. Using Mix Bus Processing to Glue and Energize

Finally, mix bus processing can help elevate your entire mix, especially in the chorus. Parallel compression on the mix bus adds energy and glue to the track, making everything feel more cohesive.

A light touch of limiting can also bring up the perceived loudness of the chorus, giving it that extra boost without sacrificing dynamics.

By applying these techniques, you'll be able to craft a chorus that not only sounds bigger but also hits harder emotionally. Dynamic contrast, widening the stereo field, reinforcing the low end, and using layers are just a few of the methods you can use to enhance your mix and create that memorable impact.

What are your favorite techniques to make a chorus hit? Share them in the comments below!

Why I Don't Mix 100% ITB

In this video, I dive into the reasons why I choose not to mix entirely in the box. While digital mixing offers incredible convenience and flexibility, I find that a hybrid approach—combining both digital and analog tools—gives me the best of both worlds. Analog gear brings a warmth, depth, and character to the mix that’s hard to replicate with plugins alone. From the subtle nuances of a vintage compressor to the unmistakable saturation of a tape machine, these tools add a unique color to the sound that helps my mixes stand out. On the other hand, digital tools provide precision, recallability, and the ability to work efficiently on complex projects. By blending these two approaches, I can achieve a sound that's both polished and organic, modern yet timeless. Join me as I discuss the benefits of hybrid mixing!

Why I Don’t Master My Mixes

Clear Perspective

It’s likely that by the time a mix is ready for mastering I’ve already spent 5-8 hours listening to it in great detail. By the end of that window my subjectivity is basically gone. It’s so important send it off to fresh ears!

Quality Control

If you work with a highly skilled mastering engineer they will sometimes catch things that you may have missed. It’s not uncommon for my mastering engineer to mention that they cleaned up some mouth pop/click or glitches in the audio.


Additional Studio Environment

Every listening environment has a different eq curve that imparts its sound on top of your listening experience. That’s why it so crucial to get your mix into one more dialed studio with skilled ears before it hits the real world. Also, gear can fail without you knowing. Like a dead tweeter or malfunctioning sub. You might not catch this if you weren’t working with an additional engineer. Think of it as mix insurance. 

Sonic Improvement

When I was coming up I worked with a lot of mastering engineers and more often than not my experience wasn’t very positive. The mix almost always seemed to sound worse after the mastering process. I know now though that you have to find someone that truly knows what they are doing. There are tons of people calling themselves mastering engineers. 9 times out of 10 your mix should come back sounding a notch or two better. 

Final Thoughts

One final piece of advice would be to find 1 or 2 mastering engineers that you send the vast majority of your work to and then reevaluate the collective work you’ve done with them over a year or two. If you keep changing ME’s from song to song you won’t really understand how they helped or hurt your mixes. Also it’s just so much more fun working with people you know & love!


Hope you found this helpful! 

Cheers! -SVH

My Go-To Plugins

I’m often asked which plugins I gravitate towards, so I thought I would create a list of my favorites!

Eq

  1. Fab Filter - Pro Q3 (This plugin gets used no joke like 100 times in each session, I mainly use it for reductions)

  2. SSL - G EQ (Love this plugin for boosting frequencies)


Compression

  1. UAD - 1176 Rev A (This plugin is magical on a vocal)

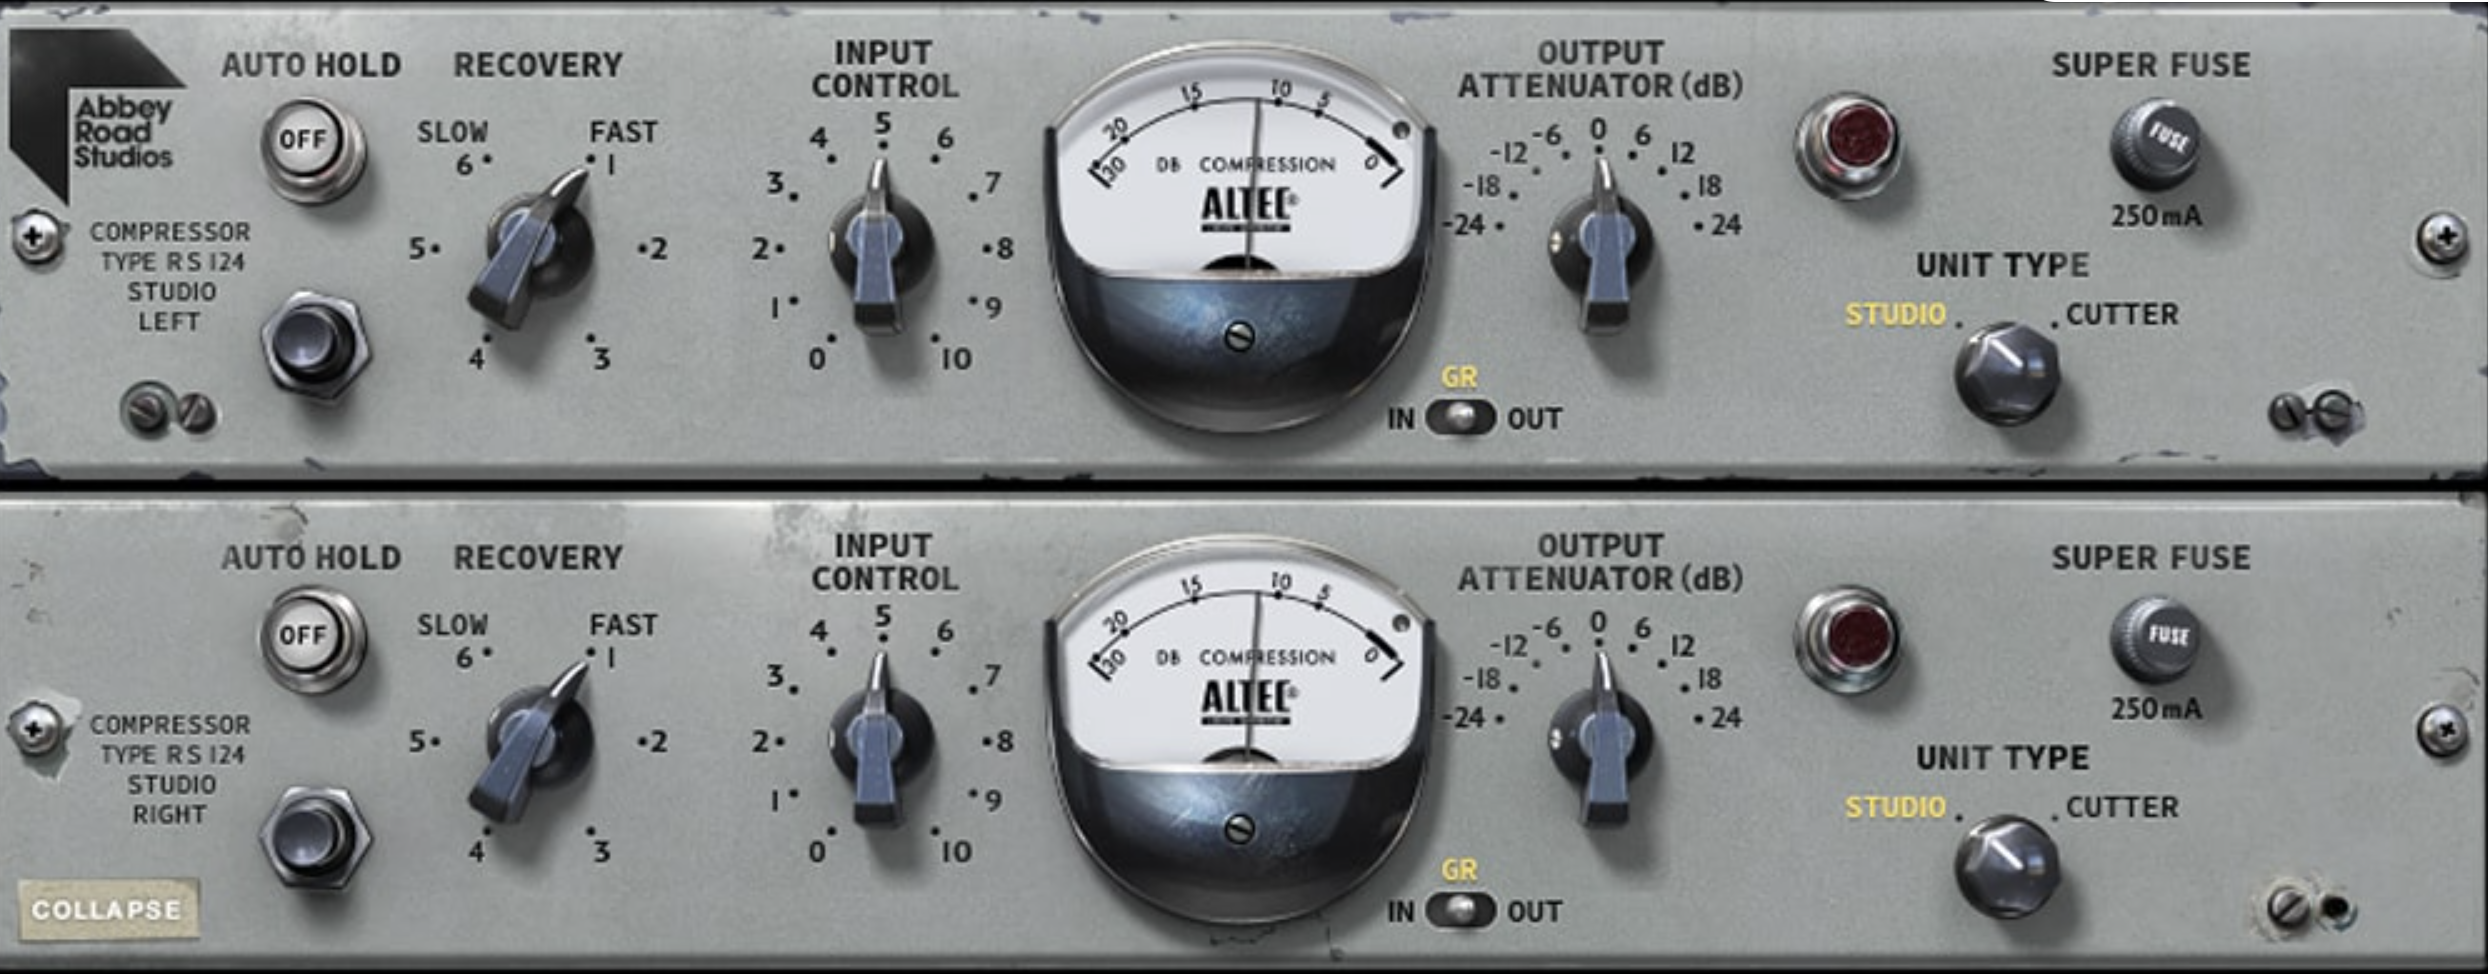
  2. Abbey Road - RS124 (Increbile on any organic element, adds such a pleasing glue & tone)


Reverb

  1. UAD - EMT 140 (Beautiful plate reverb that seems to find its way onto nearly every mix session)

  2. Valhalla Vintage Verb (Affordable and gets the job done beautifully)


Delay

  1. Soundtoys - Echoboy (no surprise here, it just works a provides so many creative options as well)

  2. Valhalla Delay (Affordable and amazing)


Stereo Buss

  1. Slate Digital - VCC (Console Emulation-adds some analog vibe)

  2. UAD - Pultec (Warms up the mix in a very pleasant way)

  3. Sonnox - Inflator (injects some energy…Don’t overdo it though)

  4. UAD - API 2500 (Controls mix and adds a nice width)

  5. Fab Filter -L2 (Finishing limiter…Mix through this, don’t pop on at the end of your mix)

I hope you found this helpful! Happy mixing! -SVH

The Client Experience Is Just As Important As The Final Product

As a mix engineer, I know firsthand that the client experience is just as important, if not more important than the final product itself. I can’t tell how many people I’ve work with over the years who have given me a quality product (production, master, graphic design, etc.) But have made getting there quite painful.

mix engineer, producer

When working with clients, it's not just about delivering a great mix. It's about the entire process, from start to finish. A negative experience can lead to a loss of business, while a positive experience can lead to repeat clients and word-of-mouth marketing.

Additionally, a positive client experience can lead to increased customer loyalty. When a client has a consistently positive experience working with me, they are more likely to come back for future projects and may even recommend me to their fellow creatives.

In a competitive industry like the audio world, the client experience can be a major differentiator! By focusing on providing a positive experience for my clients, I can set myself apart from other mix engineers and build a strong reputation in the industry!

There are many practical ways to provide a top-notch client experience. Here are a few ideas:

  1. Communicate effectively: Make sure to listen to your client's needs and concerns, and communicate with them clearly and promptly.

  2. Be responsive: Respond to client inquiries and requests in a timely manner.

  3. Be flexible: Be open to making changes or adjustments as needed to meet your client's needs. Never make them feel bad when asking for a revision. Remember… You work for them.

  4. Provide value: Look for ways to add value for your clients beyond just the product or service you are providing. This could be through additional resources, personalized recommendations, or other forms of support.

  5. Follow up: After working with a client, make sure to follow up to see if they were satisfied with the experience and if there is anything you can do to improve in the future.

  6. Just be cool, and support THEIR vision. This is THEIR art. lol

Overall, the client experience is just as crucial as the final mix. By prioritizing the experience of your clients, You can build a successful career as a mix engineer.

Why You Should Work With A Mastering Engineer

Here are 5 reason why you should be utilizing a Mastering Engineer on your next release. FYI- I’m not one

mix engineer, Producer
  1. Professionalism: A mastering engineer has the skills, knowledge, and experience to bring your music to a professional level. They can ensure that your music sounds consistent, polished, and ready for release.

  2. Quality control: A mastering engineer can catch any mistakes or issues that you may have missed during the mixing process. They can also optimize the sound of your music for various formats, such as streaming or vinyl, to ensure the best possible sound quality.

  3. Objectivity: It can be difficult for an artist to be objective about their own music. A mastering engineer brings a fresh set of ears and can provide valuable feedback and perspective.

  4. Time-saving: Mastering can be a time-consuming process. By using a mastering engineer, you can focus on other aspects of your music career, while leaving the mastering in the hands of a professional.

  5. Industry standards: The music industry has certain standards for audio quality and loudness. A mastering engineer can ensure that your music meets these standards, making it more likely to be accepted by labels, distributors, and other industry professionals.

Overall, using a mastering engineer can greatly improve the quality and professionalism of your music. It is worth the investment to have a professional take care of the mastering process, allowing you to focus on creating and promoting your music. Also, I strongly recommend finding a mastering engineer that you can create a long-term working relationship with. Getting to know them will greatly improve the final product!

Macro Guide For Mixing A Song

I often get asked how I go about mixing a song. The process is very fluid and I am constantly bouncing back and forth between instrument groups. Here is a macro guide on how I approach a mix from a linear standpoint.

mix engineer producer
  1. Begin by organizing your project. This means importing all of your audio files into your digital audio workstation (DAW) and arranging them in the order that you want them to play in. Make sure that all of the tracks are properly labeled and that you have a clear understanding of the structure of the song.

  2. Next, you'll want to set up your mixing workspace. This includes adjusting the layout of your DAW to suit your needs and setting up any hardware devices that you might be using, such as a mixing console or outboard effects processors.

  3. The next step is to address any issues with the individual tracks. This includes cleaning up any noise or unwanted sounds, fixing any timing issues, and applying any necessary effects or processing to individual tracks.

  4. Once the individual tracks are sounding good, it's time to start balancing their levels and panning them in the stereo field. Use your ears and a good set of monitors to adjust the levels of each track until they are balanced with one another and sit well in the mix.

  5. The next step is to add any necessary processing to the mix as a whole. This might include using an equalizer to shape the overall frequency balance of the mix, adding compression to even out the levels of the various instruments, or using reverb and delay to create a sense of space.

  6. As you work, be sure to take breaks and listen to the mix on a variety of different systems. This will help you get a better sense of how the mix will translate to different listening environments and allow you to make any necessary adjustments.

  7. Finally, once you are happy with the mix, it's time to bounce down the final version and save it. Be sure to save multiple copies and label them clearly so that you have a backup if anything goes wrong.

Mixing a song can be a complex and time-consuming process, but with a little patience and practice, you can learn to create professional-sounding mixes that will impress your listeners!

Which DAW Is Right For You?

As a mix engineer & producer choosing the right digital audio workstation (DAW) is a crucial step in defining your workflow. There are so many options out there, and it can be overwhelming to try and figure out which one is right for you. In this blog post, we'll go over some things to consider when picking a DAW, as well as some of the top options on the market.

mix engineer music producer
  1. Consider your needs: The first thing to think about is what you need from your DAW. Do you need a lot of virtual instruments and effects? Do you need advanced editing capabilities? Make a list of your top priorities, and use it to narrow down your options.

  2. Look at compatibility: Another important factor to consider is compatibility. You'll want to make sure that your DAW is compatible with your computer's operating system, as well as any other software or hardware that you use.

  3. Think about your budget: DAWs range in price from free to several hundred dollars. While it's not always necessary to spend a lot of money on a DAW, you'll want to make sure you get one that has the features you need.

  4. Read reviews: Before making a final decision, it's a good idea to read reviews from other users. This can give you a sense of the pros and cons of different DAWs, and help you make an informed decision.

Now that we've gone over some things to consider, let's take a look at some of the top DAWs on the market:

  1. Pro Tools: Pro Tools is a professional-grade DAW that is popular in the music industry. It has a wide range of advanced features, including support for a variety of plugins and virtual instruments.

  2. Logic Pro: Logic Pro is a DAW developed by Apple that is popular among electronic music producers. It has a wide range of virtual instruments and effects, as well as advanced editing capabilities.

  3. Ableton Live: Ableton Live is a DAW that is particularly well-suited for electronic music production. It has a range of virtual instruments and effects, as well as a unique workflow that allows for real-time performance and improvisation.

  4. FL Studio: FL Studio is a DAW that is popular among electronic music producers. It has a wide range of virtual instruments and effects, as well as advanced editing capabilities.

Overall, the right DAW for you will depend on your specific needs and preferences. Take the time to research different options and consider the factors listed above, and you'll be well on your way to finding the perfect DAW for your mix engineering needs.

How To Send a Session For Mix

One of the most frequent questions I get asked when working with either producers or artists is “How do you want me to send you the files/session?” and to this I say….well it depends ..lol.

So let me share my philosophy on this with you:

When it comes to my mix approach 9 times out of 10 I want to start where you left off.

You have worked tirelessly on this song, production, & mix before it reaches me and the last thing I want to do is zero out your mix and try to rebuild the vibe that you already had going.

If you have management & a label involved everyone has already gotten very attached to the rough mix, the last thing I want to do is blow up your rough and start over. My goal is to retain as much of what you have in your rough as possible and figure out what you love about the balance & current sonic textures.

In some cases, the producer or artist will come to me beforehand and say “ Hey, I am not really digging the current rough, Can you just do your thing and just make it better?” In this case, I will ask a few more questions about inspiration on this track to make sure my compass is calibrated and then really dig into the mix and make it as energetic and compelling as possible! 

But….most of the time the producers that I work with these days have a really cool rough mix going and they just want me to improve their low-end & overall clarity which I am totally cool with. After all I am in the service business and my number 1 goal is to make the client pumped about their record, regardless of whether or not I agree with certain mix decisions… it’s their record not mine.

Ok, so let's talk about actually preparing, exporting & delivering the files: 

Track Clean Up

Any spot where there is no important audio information on a track just go ahead and cut that area and add a fade on the front and back of the clip so that we don't have any unwanted hiss or amp buzz accumulating across the session, you'd be surprised how much hiss can add up.

Track Consolidation

If you are sending audio tracks outside of the daw be sure to consolidate all audio files so that every track in the session starts at 0 (first downbeat of the session). This way when I import these into my Pro Tools session the time/relationship of all tracks stays the same as what you have in your session.

File Naming

Drums

KICK

SNR TOP

SNR BTM

T1

T2

HATS

OHS

ROOMS

Guitars

AG 1 RHY

AG 2 RHY

AG 1 STRM

AG 2 STRM

EG 1 RHY

EG 2 RHY

Pianos & Synth

PNO 1

PNO 2

SYN 1

SYN 2

PAD 1

PAD 2

Vocals

LV VOX

BGV 1

BGV 2

DBL 1

DBL 2

You get the idea..haha.

If you want to go a step further you can also add each group of tracks into their own subfolder, extra brownie points for this.

Notes Document

Please include a document somewhere in the main folder that indicates the BPM of the song and key if you know it. Also, here is a good place to tell me about any references used for the song. It’s always very helpful to know what some of the inspirations were.

Bit Depth & Sample Rate

I like to mix the session at whatever bit depth & sample rate you used while producing the track. Just be sure to at least give me 24-bit files.

I still see a ton of sessions come in at 44.1 & 48 and the rare time I’ll see 88.2 and 96. I’ll leave this totally up to you, but if you are not sure which to use I recommend 48.

Exporting

If you are producing in Pro Tools just delete all files that are inactive in the session (to make the file size smaller) and zip the whole session folder and send via Wetransfer or Dropbox. 

If there are any plugins that I don't own that you are using all over your session I will most likely just buy the plugin. But If it’s a few tracks that really add to the sound I might hit you back and ask you to commit/bounce those and send them back.

If you are in Logic, Cubase, Ableton or any other DAW this is the preferred method: Print stereo tracks of parts that are alike and include all plugins and fx so when I import into Pro Tools your mix recalls.

The only tracks that I don't want the effects baked into are any lead vocal parts. Just bounce out those reverbs/delays etc. separately so I can play with the dry/wet blend on those.

Also, print all tracks individually without plugins and FX that way if I can't get what I need out of the stereo tracks I can import the raw file and rebuild that sound from the ground up. Put these in their own folder labeled “raw.”

I hope you found this helpful. If there are any other areas that you are not sure on please leave a comment down below and I will reply asap!

Cheers!

-Stephen


It's All About Contrast!

I have worked on hundreds of songs over the years and everytime I work on another song these concepts become more and more apparent to me. Kinda like panning for gold, the more water you add (aka songs) the more you are able to identify what is true and what elements a great song encompasses. So here are a few of my thoughts when it comes to contrast in your music.

It’s pretty easy for me to spot a beginner song/production just in this one area alone. For example, the beginner productions typically will have an acoustic guitar playing at the same intensity level the whole way through the song not pulling back in the verses and bridge, just plowing through the whole duration of the song at the same intensity level. Not good..lol  Another example with a more full production would be the verse feeling almost as big as the chorus with no added instrumentation in the big sections. This will cause the listener to lose interest so quickly. We are trying to take the listener on a journey. Take them up, take them down, turn them sideways… you get the idea lol.  It’s all about the plus and minus- take away here and add there- make small then make big. Another way to think of it is like a painting if you were trying to paint a landscape and were only using one shade of paint there would be no way to create dimension differentiation, you’d just be left with a blob of paint haha and the same goes for your song.


This same concept applies to an artist’s sonics. So often we are tempted to replicate sonically what we have seen to be well received and just make it slightly different, repackage and release. I think a better approach to gaining attention in a world with so much noise is to do the exact opposite of what is currently working. You will have a way better chance of getting noticed and will increase your odds of cutting through the noise.  If you are a pop artist and everybody is going super polished electronic then consider going raw stripped back acoustic. Art has and will always be about presenting something unique, you lose every time when you walk down the path of emulation. It’s so important to polarize!!  I cringe a little bit when I hear a song and know what reference tracks they were using in the songwriting & production phase. Listeners aren’t dumb and will totally pick up on this.

On a more production note think about frequencies and sound-field. When it comes to frequencies a subtle way to make the listener feel like things are constantly changing is to control how you are presenting low-end. Low-end is super exciting and really can impact the listener in a visceral way- don’t use it haphazardly. Try pulling most of the low-end out of your tracks during a verse and then when the chorus hits add that back in or vice versa. Or try using full frequency on the verse and then pulling everything but the vocal and a pad or piano when the chorus hits. It is all about adding and taking away constantly through the song. This is what separates an amateur production from a professional one.

When it comes to sound-field you have mono and stereo to play with so fully exercise that. Oftentimes I receive tracks to mix and everything in the track is basically stereo. Here’s the deal though if everything is stereo it's basically just mono sounding. Stereo can’t feel big with out mono elements in the track. For example, let's say you have a stereo-tracked electric guitar part all the way through the song try automating your panning to create more interest. So in the verse’s pan have those tracks at more like 50% in and then when your big sections hit then pan those puppies hard left and right. This will really give the listener the sense of the song getting massive in the chorus! Just remember- contrast baby- in everything!

Hope this helps!

-Stephen

Interview with Grammy Winning Mix Engineer - Ainslie Grosser (For King & Country, Mute Math)

In this interview, I talk with Ainslie Grosser all about his mixing career. He shares tons of tips on getting the most out of your mix & also shares some invaluable career advice as well! Grab a pen & paper and enjoy this conversation with one of the best Mix engineers in the audio industry!

Here are a few of the artists he's worked with. Mute Math, for King & Country, Aaron Gillespie, Elevation Worship, the Afters, Plumb, Hillsong, Bethel Music & Jesus Culture Thanks again Ainslie!!